
Case in point. Today I checked a saddle that, at glance, was in wonderful condition. Sat on the horse balanced, showed no wear, etc. Upon closer examination, however, there were some major red flags. It first started with a peak at the serial number. It was impossible to read. This saddle was in pristine condition and even on older, well worn saddles, the maker's stamps and serial numbers are typically quite easy to read. Next was a flexion text, which it failed miserably. Also, you could see the very top of the billet was a fresh cut of leather. Indicating that this was a new strap. I wish I could say this is an uncommon occurrence but it's actually not. Sometimes asymmetries and tree abnormalities can be easy to spot and sometimes it can take some detection work and the assistance of a professional. We wish to believe everyone is honest and wouldn't put a broken tree back on the market but unfortunately, this is not always the case.
Before I get into how to check the saddle tree, here are some basic English and Western saddle anatomy diagrams:


Now, moving on. Here are some of the ways I check English saddle trees:
1. Grasp the front of the pommel with your thumbs on the "buttons" and your fingers underneath the panels and pull outward. Look for scratches, wear marks, etc on the pommel that may offer clues. A synthetic tree may have a little movement but it still should not be to the degree that it is suspect. Even if a synthetic or flex tree is not broke but has too much play, it will make your horse sore. Listen for any sounds the tree may make.
2. Sit down and put the cantle on your thigh up against your stomach and put your hands on the pommel. Thumbs on the buttons and hands on the panels. Pull the pommel towards your stomach. Also, pull at a diagonal (pull left side of pommel to right side of cantel and vise versa) and every which way you can. Compare each side, does one side move more than the other? Listen closely. Do you hear any clicking, clunking, etc? Look closely at the movement of the leather. Are there any creases in the leather?
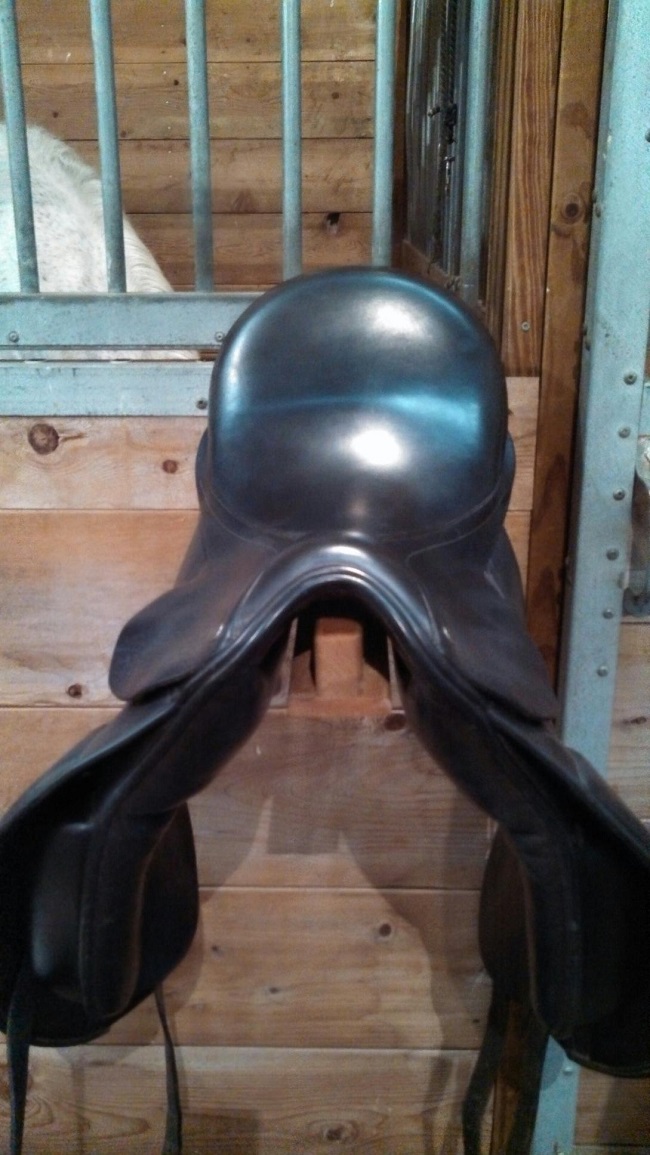
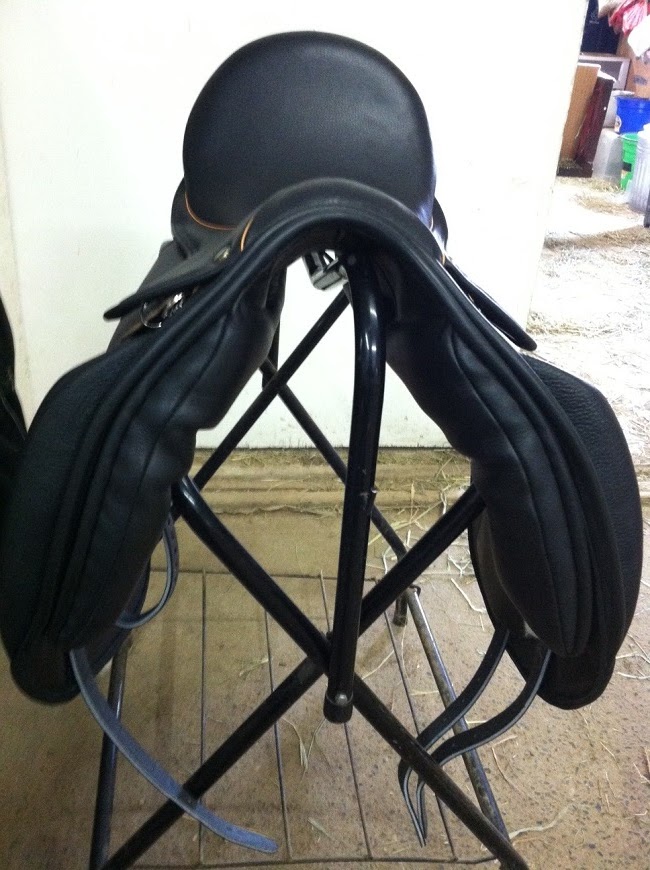
Here are two photos of a saddle with a broken tree. Notice the line across the seat.

3. This step is the same as step 2 but in reverse. This time the pommel will be on your thigh, up against your stomach and your hands will be on the cantle. Pull towards your stomach.
4. Flip the saddle over and run your hands down the panels checking for flaws, hard or uneven panels, or uneven wear marks in the leather. After you have done that, starting at the front of the saddle push downwards checking for movement from front to back.
5. Check the billet straps to check for loose stitching, thin or broken leather, and any other abnormalities.
6. Check the stirrup bars. Stirrup bars should be even and be fully functioning.
7. Finally, check the saddle for asymmetry. Look at the saddle from every single angle. Look at it from the back, notice any curvature in the tree. Look at it from the front. Compare the stitching from side to side, compare buttons, look at the angle of the pommel, etc. It is especially important to assess symmetry and balance in saddles that have had previous tree manipulations done on them.
Here is a photo of asymmetry in a dressage saddle. Can you see what's wrong?
Here are some of the ways I check a Western saddle:
1. Try to move the horn. Push it forwards, backwards, and to both sides. There should be no movement here.
2. Placing the saddle on the floor on its horn, push firmly on the cantle. Watch for movement in the bars while you do this. There should not be any.
3. Sit down and put the saddle on your thigh with the horn facing your stomach. Push the horn and the cantle away from each other. On a well made saddle with a solid tree, it actually hurts your arms a bit. The difference in wood v synthetic trees is for a different blog post; however, I will say this, if you are noticing a lot of flexibility it may flex in very undesirable ways once you have the biomechanics and weight of the rider. Instability = pressure points. The saddle should feel rock solid and square.
4. Then push the horn and cantle towards each other.
5. Also put one hand on the horn and one on the seat and push hard. You want to push and pull the saddle every which way checking for movement.
4. Run your hands over every inch of the sheepskin feeling for sharp points such as staples, screws, or nails. Look for any unusual wear patterns in the sheepskin. Feel for any lumps or bumps in the tree.
5. Pull the stirrups forwards, backwards, and straight down hard. Listen for any noises and feel for any motion coming from the tree.
6. Look at the stitching throughout the saddle. On the swell. On the cantle. Try moving pulling up on the cantle. Assess the rigging attachments and billets. For safety purposes, stick with only leather billet straps. NO nylon!
7. Finally, assess the saddle for symmetry the same way as I described above for english saddles.
Whether you are riding english or western, you should never hear any noises coming from the tree when you are riding. When you are sitting in the saddle, move all about, putting all your weight in the stirrups in front of you and behind you while paying close to how the tree feels underneath you.
Some asymmetries and flaws are easy to see and some require a trained eye to spot. There are those that will debate subtle degrees of asymmetry will not sore a horse. This may or may not be true. There are some horse and riders that may not be affected and others that will be greatly affected. At any rate, if you are uncertain, contact a reputable professional.
No comments:
Post a Comment